Transform a Thriftstore Mirror into a Chalkboard Sign | #diy
This is a guest post by Lourdes Resendez from Embrace Life Doula Services.

Last year, Lisa and I, and our doula businesses East Houston Doula Services and Embrace Life Doula Services, sponsored the Houston Natural Parenting Expo featuring the Big Latch On. The event was held at a local church. We needed guests to know where the event was being held because the church has several buildings, so we needed something eye catching. Of course we had several ideas. Some would require a good amount of money, others would require more time than we had to execute. At some point we decided on a chalkboard sign. After all, they’re pretty and we would be able to use it at another event. I did some research then I went shopping.
Lisa gets to do the all of the computer work while I get to shop and create. How the heck did I get so lucky?
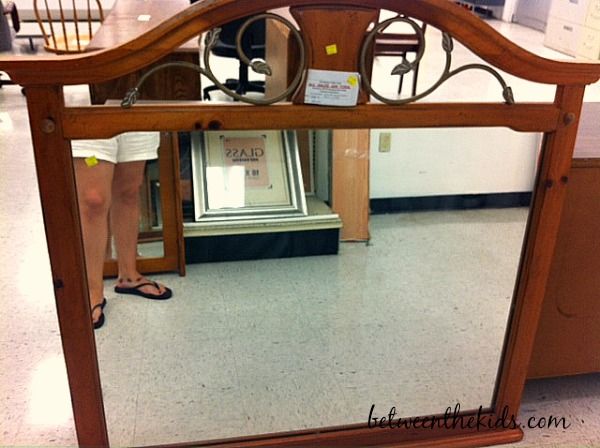
Off I went to the local thrift stores. It didn’t take long before I found a mirror I fell in love with. I’m pretty sure it was at my first stop. It was the perfect size for our welcome sign. The frame is made of real wood so it’s very sturdy. The price could not be beat! The price tag said $19.99. That day, the blue tags were 30% off. As luck would have it, this mirror had a blue tag! I ended up with an awesome mirror for about $16!

Next stop: the hardware store for supplies to turn this beautiful mirror into a chalkboard with a brightly colored frame. My color choices for the frame made Lisa nervous. She didn’t tell me at the time, but she was afraid my vision would turn out looking like a piñata by the time I was done. I purchased some primer, chalkboard paint, a very inexpensive paint roller, some small paint brushes, and 8oz samples of paint (less than $3 each) that would prove to be more than enough to paint the frame of the mirror and some other decorations we were planning on using for the event.
Supplies in hand, I headed home to begin the transformation.
First I painted the frame of the mirror. I didn’t want to risk getting any paint on the chalkboard part so I chose to make this my first step.
I applied 2 coats of paint. I wanted to frame to look a little distressed so I didn’t pay too much attention to making sure that the wood was evenly covered.
When that paint was dry, I put painter’s tape along the edge of the frame to prepare to turn the mirror into a chalkboard.
I primed the mirror and allowed the primer to set. I can’t give specific times for how long I let everything dry.
Some advice I can give is not to add another coat while the previously painted one is even a little damp. Allow each coat to dry completely before adding the next, especially with the chalkboard paint.
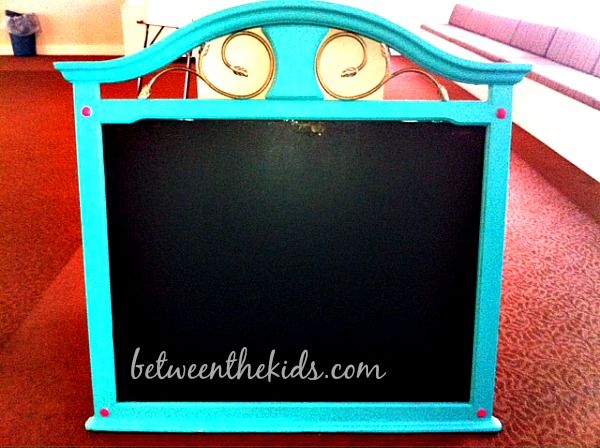
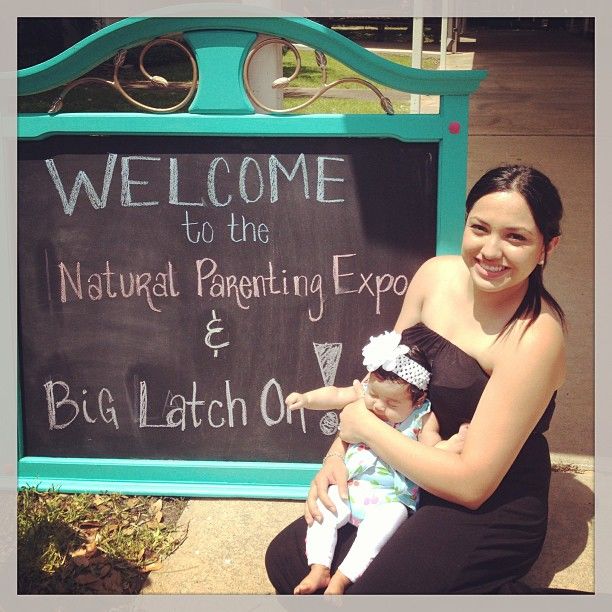
After the primer dried, I applied the chalkboard paint for a total of three coats. The end result was better than I had hoped for! I think our chalkboard “Welcome” sign was a hit! We had an Instagram hashtag for our event written on smaller signs that we made and forgot to grab pics of!

When we looked back at all the pictures, several moms and their babies took pictures by the sign.
 Thank you _dianattack_ for allowing us to use your Instagram photo!
SUCCESS!!! We love this sign, and we plan to use it at many events to come!

That’s such an awesome idea! What a great way to repurpose!
oh man what a cool idea! I would have never thought to use a mirror like this!
I love this idea! My daughter and I were just at Hobby Lobby pining over the gorgeous but expensive chalkboards. I always run across old mirrors at yard sales — this is going on our summer projects list!
They are SO expensive!
What a brilliant idea, and not expensive at all! My daughter has been wanting a chalk board in her room for the longest time, but not a plain, dull looking board, and I think if I can find a mirror like this, we might just try to do something like you did, ourselves!
that looks SO CUTE! I love how easy it is, thank you!!
Super cute!
I wish I had of seen this earlier when we were re-designing out front entrance.
This would be PERFECT!
Love the blue!
That’s a great idea. I never would have thought of it! I love the natural wood color it was but understand the need for brighter colors for the sign to stand out.
Such a great idea! It’s relatively easy for anyone to do, too! 🙂
WOW! I love this!! I’m going to pin it for later!
What a wonderful transformation! I love the color.
I wouldn’t have thought the paint would adhere well to the mirror surface & would have replaced it with hardboard. Guess that wouldn’t have to be done.
I thought the same thing, but this worked really well.
Beautiful! Now I wish I had a mirror to do that with.
Never in a million years would I have envisioned that project. Man, you’re good. That’s fantastic.
So cool! Love the color you chose too.
Wow, what a very cool idea. Thank you!!!
This is a great idea! You make it look so easy.
What a cool idea! This would be great for a fun outdoor sign at a party
Awesome sign! I would probably paint the metal swirleys black for an iron look!
Yeah, if it were mine, I’d have done the same thing. She literally got it the day before the event, so she may have painted it by now! haha!
That turned out beautifully! I love the color you chose. I’d love to make one of these for my son’s room!
Ooh I really love it! I am glad how you showed her next to it becuase I thought it was smaller. Because its a mirror would this break easily?
No idea, but I surely don’t want to find out either. I think they’ve been really careful with it. I’m wondering if the paint somehow strengthened it some. Not that it’s UNbreakable, but maybe a little stronger? And yeah, it’s pretty big. I’m pretty sure it was a mirror that went on top of a dresser.